Assembling your scuba diving equipment correctly means you have the key to be confident and a safe diver. However, most SCUBA divers are able to scuba dive only a few times a year, so they can forget this skill easily.
But you don’t need to be worried, we have covered all the topic in our article. With 17 easy steps to follow, you will know everything you want to correctly assemble your scuba diving equipment.
How to Assemble Your Scuba Diving Equipment by Steps
On talking about how to assemble your scuba diving equipment for recreational scuba diving, we have about three main components from our equipment that needed to be assembled:
- The buoyancy control device (the BCD).
- The regulator.
- The scuba cylinder.
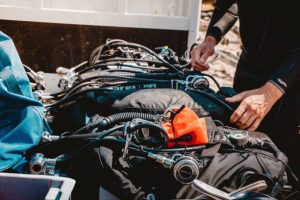
Assembling your scuba diving equipment may be a daunting task, but with the right guidance and practice, you can make it second nature. In this guide, we will walk through a step-by-step process of assembling your scuba diving equipment to ensure having safe and enjoyable diving.
Step 1
Make your scuba diving cylinder to be standing upwards on a flat, hard surface.
Step 2
Check your cylinder’s valve to ensure that there is no corrosion or rust. If there is a yoke valve in your cylinder, check the o-ring of the valve for any sign of wear or cracks. If there is any problem, replace the o-ring with a new one.
Step 3
Stand in front of your diving cylinder. you should put the cylinder next to your left side in order to be able to see the opening of the cylinder’s valve where you will attach the regulator.
Step 4
Stay in a position opposite the cylinder and attach your BCD. You can find several straps found at the back of the cylinder bands (BCD) which you can use to place them over the top of your cylinder.
keep the valve handle next to your left and the front of your BCD to be facing towards you. It’s a crucial thing to ensure that your BCD is positioned correctly. The handle that is found at the top of your BCD should be in line with the cylinder valve’s base.
Step 5
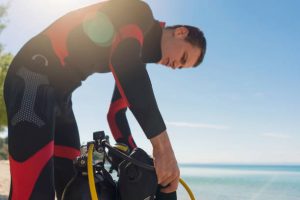
Your cylinder band should be tightened and fasten around your cylinder. Just pull it over the buckle and snap it closed.
If you are using a cylinder made of steel, this means that you will need a net bag to ensure that your BCD doesn’t slip. If you are using a tank that is made of aluminum, ensure to wet the band of the cylinder to create a grip.
Step 6
To make sure you will not lose your BCD when scuba diving, just lift it gently by the handle to ensure that it’s attached securely to your cylinder.
Step 7
Now you can attach your regulator. First take it and hold it by your first stage. The two hoses should be on your left (the breathing apparatus) and the other two hoses should be on your right (the low-pressure inflator hose and the SPG).
Step 8
Don’t forget to remove the dust cap from the first stage of the regulator. The dust cape can prevent any dirt or water from entering your regulator.
Step 9
Place the valve of your regulator into the valve of your cylinder and ensure that the valve of your regulator and the valve of your scuba tank are aligned.
*Please keep in mind that this guide is for the DIN regulators, Yoke regulators will surely be different when you attach it to the cylinder.
Step 10
To fix the first stage in your cylinder firmly, tighten it with a screw, but ensure not over-tighten it in order not to Hinder the first stage movement.
Step 11
Attach the low-pressure inflator hose to the low inflator valve of your BCD.
Step 12
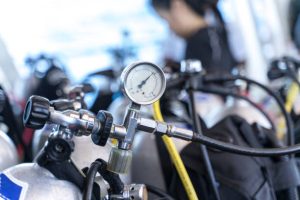
Keep the SPG away from you and hold it while keeping the BCD facing the glass and open your cylinder. Ensure to do that by turning the tank knobe in a counterclockwise movement until it doesn’t turn. Take a look at the SPG, its needle should move to indicate the amount of air in the tank.
Step 13
Now, it’s time to check that your scuba gear is working correctly. First, check the quality of your air. Press the purge button on the second stage and then smell the air.
The air should be fresh and clean. If you smell petrol or rotten eggs, don’t use this cylinder and return to the Dive center who filled it
Step 14
Remember to test your BCD and ensure that it’s inflating and deflating correctly. Fill your BCD with the use of the manual inflator hose and then deflate it with the help of the slow release dumb valve. Continue this process by testing the dump valve in the top and bottom.
Step 15
Try to take a couple of breaths from the octopus and second stage. Ensure to keep an eye on the SPG while breathing. When breathing from the regulator, the SPG’s needle should be holding steady without moving.
Step 16
The final step on our steps to assemble your scuba diving equipment is to ensure placing the hoses of the regulator in the correct position:
- Place the SPG through the back pocket, specifically out the front of the holder of the SPG.
- Place the octopus into its holder, some BCDs have clips that you can hold the octopus and the SPG in.
- Ensure that any of your scuba diving accessories such as whistle or SMB are tucked away and keep your equipment streamlined
Step 17
Finally to prevent the cylinder from falling and injuring yourself or damaging your equipment on the floor slowly.

So, you reached the final lines in our Article which is regarded as a step by step guide on how to assemble your scuba diving equipment. Just remember that you need now to practice in order to apply the previous steps over and over again. What are you waiting for? Book some more dives now!!